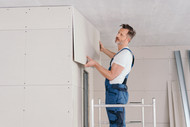
How to Expertly Clad a Wall: Your Comprehensive Guide
29th Feb 2024
Wall cladding involves covering one material with another, serving both aesthetic and protective functions in buildings and homes. It significantly alters a structure's appearance, adds insulation, and shields walls from weather-related damage.
In this comprehensive guide, the experts from Canterbury Timber will walk you through the intricacies of wall cladding, from choosing suitable materials to executing the final touches, providing an easy-to-follow process. Let’s get started!
Selecting the Right Materials
The first step in your wall cladding project is choosing the right materials. The variety is vast, including wood, metal, vinyl, stone, and composite materials, each offering unique benefits.
Wood, for example, adds warmth and a natural look but requires regular maintenance. Metal cladding, such as aluminium or steel, provides durability and a modern appearance.
Stone and brick offer a timeless appeal and substantial durability, while vinyl and composite materials provide a low-maintenance alternative with a wide range of colours and styles. Consider the aesthetic you wish to achieve, the climate, and maintenance requirements when making your choice.
Preparing the Wall Surface
Proper preparation of the wall surface is crucial for a successful cladding project. Start by cleaning the wall to remove any dirt, grease, or loose paint. For exterior walls, this might involve power washing. Ensure the wall is dry and repair any damages or irregularities. For indoor walls, you might also need to remove old wallpaper. Applying a primer or a moisture barrier is essential, especially for outdoor cladding, to prevent water damage and ensure a secure foundation for the cladding.
Measuring and Planning
Accurate measurements and careful planning are key to avoiding waste and ensuring your cladding fits perfectly. Measure the height and width of the wall to calculate the total area and determine how much cladding material you'll need, allowing for a little extra for cutting and fitting.
Sketch a layout plan, considering the direction and pattern you want your cladding to follow. This step helps in visualising the end result and guides the installation process.
Cutting the Cladding
Once you have your materials and measurements, it's time to cut the cladding to size. Using the right tools for your chosen material is essential – a saw for wood, a grinder for metal, or a wet saw for stone.
Measure and mark your cladding carefully before cutting, and always wear appropriate safety gear to protect yourself from injuries. It's advisable to cut pieces as you go, ensuring they fit the space perfectly, especially around corners and openings. If you lack the proper tools, or if you just want to make the process easier, consider taking advantage of our cutting and milling service.
Installing the Cladding
The installation process varies slightly depending on the material but generally follows the same basic steps. Start at the bottom of the wall, working your way up, and use the appropriate fixings for your material – nails for wood, adhesive for stone or vinyl, or screws for metal cladding.
Ensure each piece is level before securing it and maintain consistent spacing between pieces if your design calls for it. For ventilated cladding systems, make sure there is adequate space behind the cladding for air to circulate.
James Hardie Cladding: A Durable and Stylish Option
James Hardie cladding is renowned for its durability and aesthetic versatility, making it a superb choice for wall cladding. Made from fibre cement, it's resistant to fire, moisture, rot, and pests, ensuring long-lasting protection and minimal maintenance for any building exterior.
With a variety of textures and colours available, from weatherboards to sheet cladding, James Hardie cladding allows for customisation to match any architectural style, offering both a stylish appearance and enhanced durability. This makes it not only a practical investment for safeguarding your property but also a valuable addition to elevate its overall appeal.
Finishing Touches
The final step in cladding a wall is applying the finishing touches. This might include sealing the cladding with a protective coat, painting or staining wood cladding, or applying grout between stone tiles. These finishes not only enhance the appearance of your cladding but also protect it from the elements and prolong its lifespan. Finally, clean up any excess materials or debris from the installation process.
A Wall-Done Job
By following these steps and tips, you can successfully clad a wall, enhancing the beauty and functionality of your space. Whether opting for the natural elegance of wood, the durability of metal, or the low maintenance of vinyl, cladding is a great way to elevate your space with style.
To find out more, or to get started on your wall cladding journey, contact us today.
FAQs
What is wall cladding?
Wall cladding is a process where a layer of material is applied to the exterior or interior walls of a building. This can serve aesthetic purposes, provide insulation, and protect the walls from weather and environmental damage.
How long does wall cladding last?
The lifespan of wall cladding depends on the material used and the quality of installation. Most cladding materials, when installed and maintained correctly, can last anywhere from 20 to over 50 years. Metal and stone cladding are particularly durable, while wood cladding may require more maintenance to reach its full lifespan.
Can I install wall cladding myself?
Yes, many wall cladding projects can be a DIY endeavour, especially with materials like vinyl, wood, and some composite claddings. However, for heavy or complex materials, such as stone or metal, or if the building is particularly tall or the design complex, professional help might be necessary.
How do I maintain clad walls?
Maintenance varies by material. Wood cladding should be inspected annually and treated or painted as needed to protect against moisture and pests. Metal cladding may need periodic cleaning and rust removal. Vinyl and composite cladding require minimal maintenance, usually just cleaning with soap and water. Stone cladding should be sealed to protect against moisture and cleaned with non-acidic products.

